Last Updated on December 31, 2023
Today, we’ll make a delicious high-altitude yellow cake recipe with creamy buttercream frosting. It’s as easy as always, but functions much better!
We recently went to a region with much higher altitudes. When we tried our usual foolproof cake recipe, it completely sunk in and become dry and dense.
This led us on a research bender which ultimately led us to realize that most cake recipes don’t work at specific sea levels. So, developed one that did!
What Is A High Altitude Yellow Cake Recipe?
A high-altitude yellow cake recipe has been specifically designed for baking at higher altitudes. But, how does baking differ at these levels?
The lower air pressure causes the air bubbles in the cake batter to rise more quickly. However, this hasn’t given the structure enough time to set yet. So, without any support to hold the rise in the cake, the batter just deflates and the cake sinks in. This directly causes a more dense and dry cake.
The best way to offset these effects is to alter the recipe. You will see that high-altitude cake recipes look very strange. But, it’s necessary adjustments to make the cake work functionally while still remaining delicious.
Our recipe is equally delicious, still relatively versatile, and can be flavored and decorated in any way! It’s soft, spongy, and packed with vanilla flavors too.
What You Need For This High Altitude Yellow Cake Recipe
Ingredients for the yellow cake layers
- 1 1/2 cups + 4 teaspoons all-purpose flour, sifted
- 1 teaspoon baking powder
- 3/4 teaspoon fine salt
- 3 large eggs, room temperature
- 1 1/3 cups granulated white sugar
- 1 tablespoon vanilla extract
- 3/4 cup + 1 tablespoon milk, lukewarm
- 3 tablespoons unsalted butter, melted
- 1/4 cup vegetable oil
Ingredients for the buttercream frosting
- 1 1/2 cups salted butter, softened at room temperature
- 6 1/2 cups powdered sugar, sifted
- 1 1/2 tablespoons vanilla extract
- 7 tablespoons milk, room temperature
Equipment
- Two 9-inch round cake pans
- Non-stick baking paper or spray
- Measuring cups and spoons
- Mixing bowls
- Electric whisk
- Bowl scraper or rubber spatula
- Cooling rack
- Cake board or stand
- Offset spatula
- Piping bag, optional

Step by step instructions
Step 1: Make the cake batter
Preheat the oven to 360ºF (180ºC) and line your cake pans with non-stick baking paper.
In a bowl, sift together the dry ingredients. Set them aside.
Then, in a separate large bowl, whisk together the eggs, sugar, and vanilla. Keep beating them for about 2-5 minutes at a high speed. Your mixture is ready when it has reached ribbon stage (see tips).
Now, add the dry ingredients to the wet egg mixture. Mix the batter together at a low speed until the ingredients just combine. Remember to scrape the sides and bottom of the bowl.
Now, whisk together the lukewarm milk, melted butter, and vegetable oil. Then, slowly add the warm mixture to the cake batter base. Gently whisk in the ingredients. You should eventually get a smooth uniform cake batter.
Step 2: Bake your cake
Divide the cake batter between your lined cake pans. Then, each cake for roughly 25 minutes or until a cake testing needle (or toothpick) comes out clean.
Remove the cake from the oven and loosen the edges. Allow the cake to cool inside its pan for 10 minutes. Then, remove it and cool it at room temperature.
Step 3: Make your frosting
To start, beat your butter at a medium-high speed for roughly 3-5 minutes. Your butter should become light in color and very soft and fluffy in texture.
Then, add the powdered sugar in three additions, mixing well between each. Scrape the sides to ensure you evenly mix all the ingredients.
Once all the powdered sugar has been incorporated, add the vanilla and mix it well. Then, add half of the milk at once. Mix it in thoroughly.
Then, adjust the consistency using 1 tablespoon at a time. Keep adding until you have the consistency you are looking for.
Step 4: Assemble your high-altitude yellow cake recipe
To start, add a dollop of frosting to the center of your cake stand or board. Then, add the first cake layer. Add a generous amount of frosting on top and spread it evenly. Add your next layer of yellow cake.
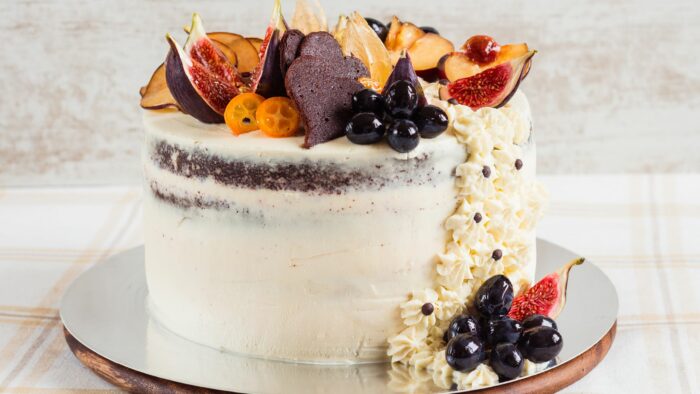
Now you can decide whether you want to make a cake that’s completely frosted, a rustic cake, or a naked cake.
Whichever you choose, use the remaining frosting to decorate the cake to your liking.
Add the garnishes of your choice and serve the cake within 4 days.
Expert Tips And Tricks
- If you don’t have 9-inch pans, you can also use three 8-inch round pans. You can also use two 8/9-inch square cake pans. The different pans will have slightly different baking times.
- If you aren’t sure what ribbon stage is in baking, have a look at this visual example. Your egg and sugar mixture should reach this stage before you proceed with the recipe.
- If your cakes domes too much, you have to level them. There are some special tools available for this. But you can also just use this guide. No matter which method you choose, just ensure your cakes are level. Otherwise, you’ll end up with a lopsided cake.
Preparations Times And Servings
| Preparation Times | Baking Times | Servings |
| 20 minutes | 25 minutes | 6-8 |
Wrapping Things Up
This high-altitude cake is just as easy to make as any other. But, it will solve your baking problems at these levels. So, no more sunken-in cakes or dense rubbery textures. Now, you can enjoy your baked items too!
Let us know how your high-altitude yellow cake recipe went. And, feel free to share it with some of your fellow bakers!